Last weekend me and my wife did a beginners course of taxidermy. This doesn’t make me any pro, but at least I know if I like it or not. It’s possible that you see some pictures in this post, you don’t want to see. If so, then stop reading !
Course
After a drive of 2 hours, we were where the beginner course taxidermy was held. We had the choice of a mole or a small duck. Those animals weren’t killed for the course. They were kill by animalcontrol.
First we had to skin and clean the mole. This is a very secure thing and although the mole was dead, I didn’t smell anything. In the beginning the mole was still frozen, so it’s easier to skin it.

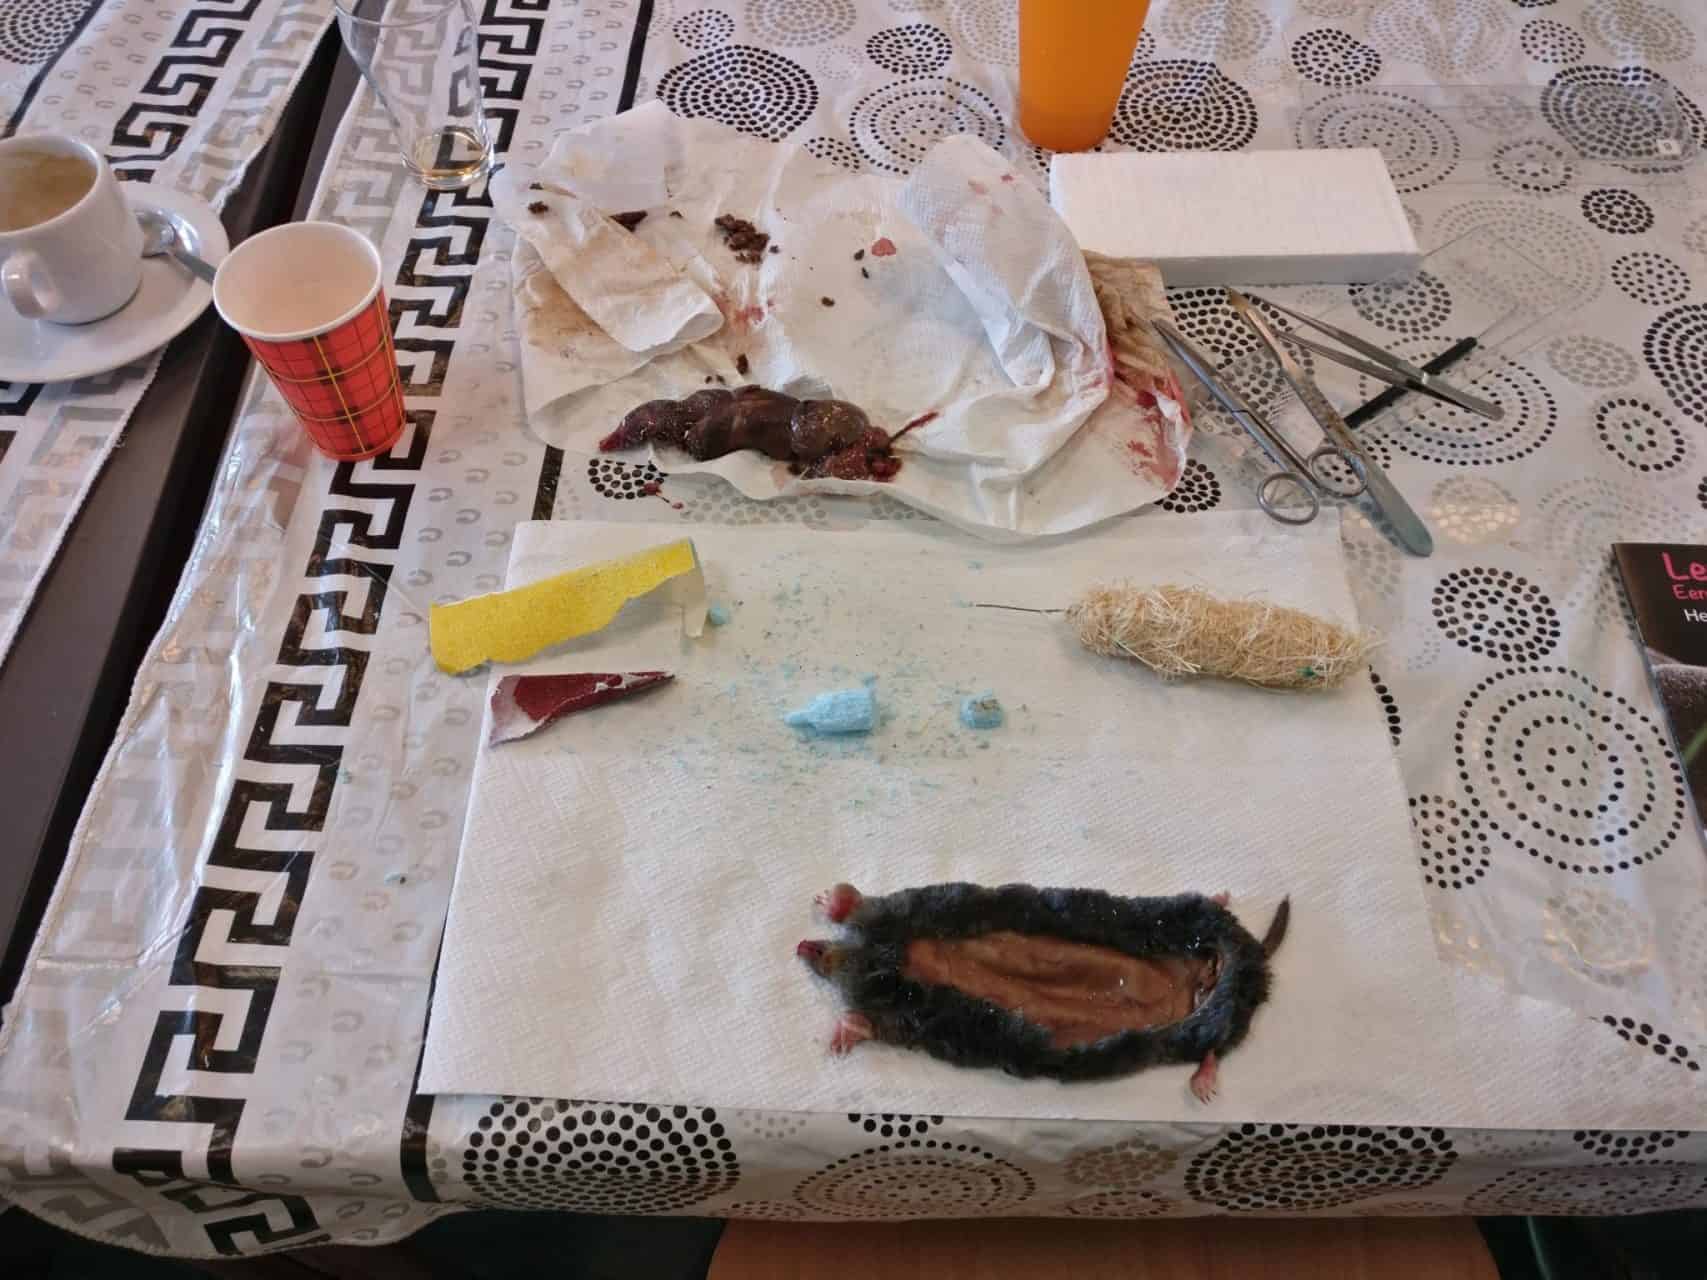
Clean the mole with special wash stuff and dry it.
Now it’s time to stuff the mole. The skull should be molded and the body is from woodwole.
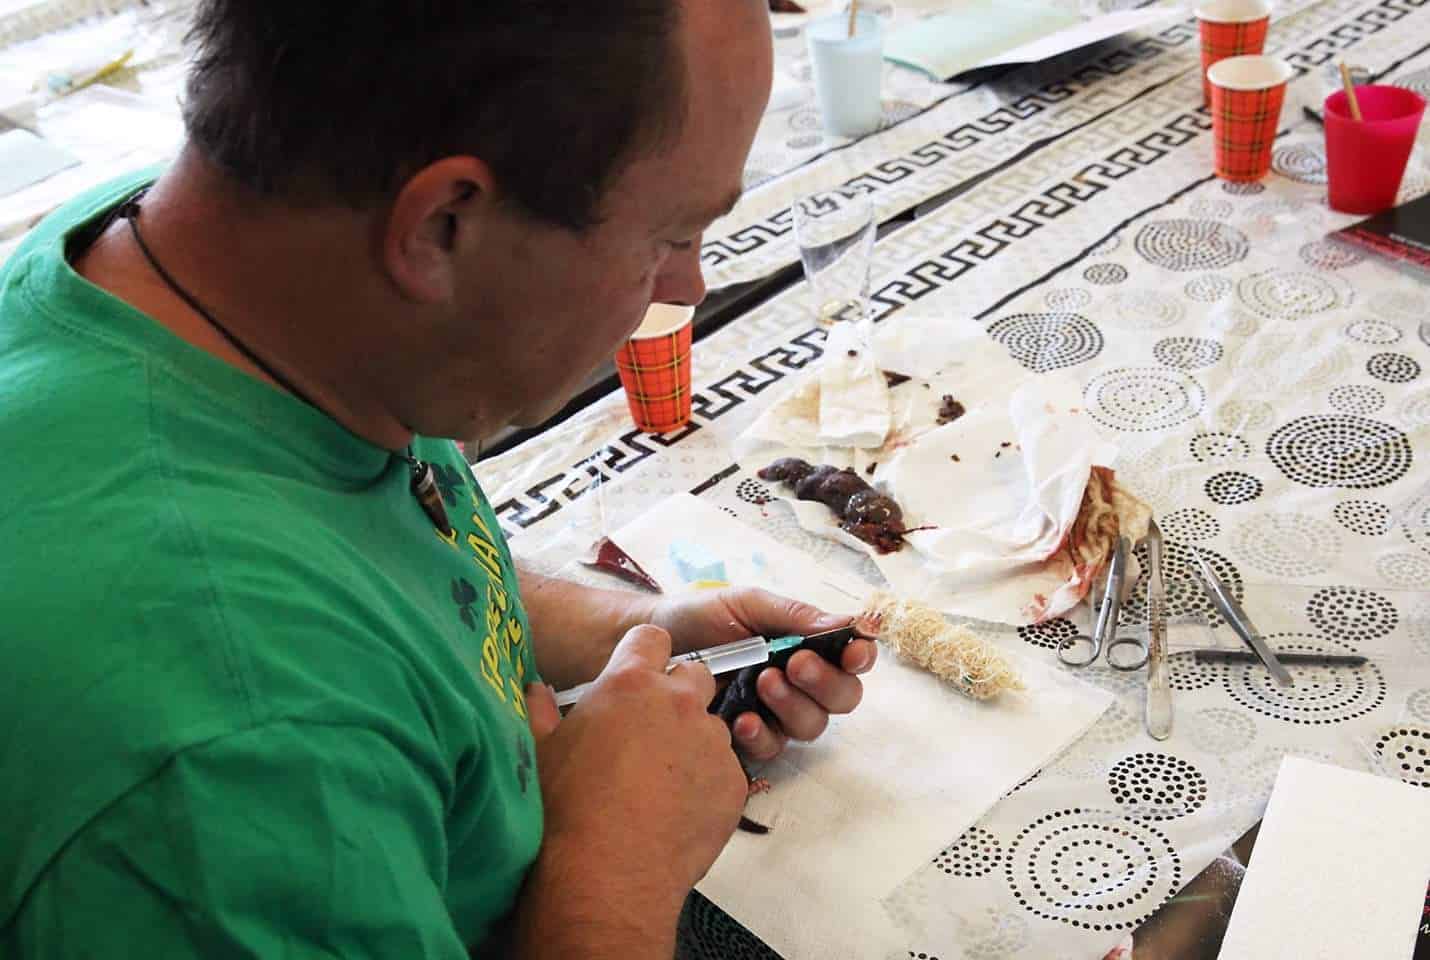
Clean the skin and the feet are injected with special stuff.
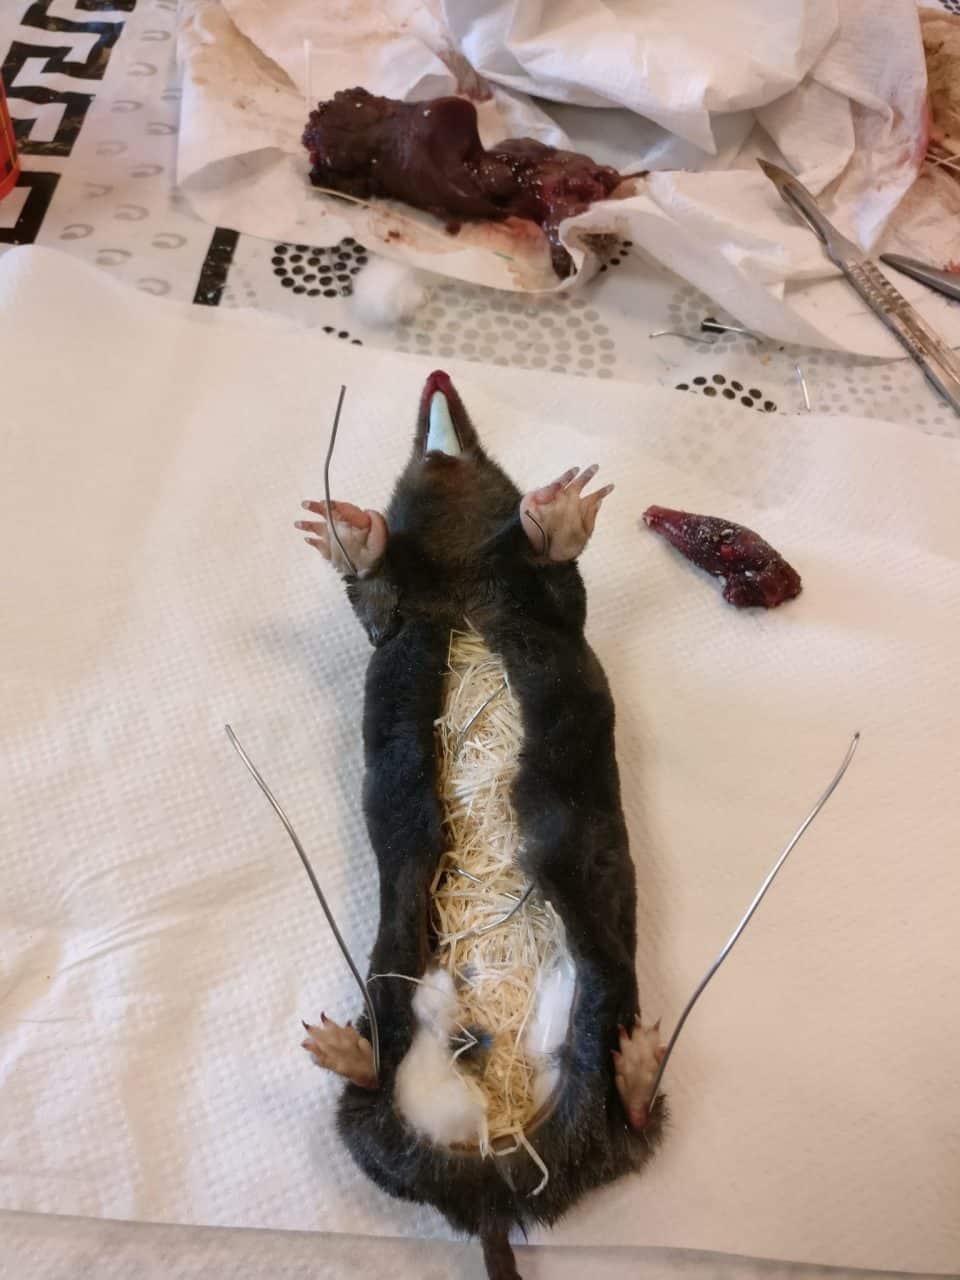
The iron thread at the legs is so that you can put the mole in different positions.
Almost finished. Just sew the mole and this can be a hard part, because the skin is very hard. I recommend a special needle otherwise it’s almost impossible.
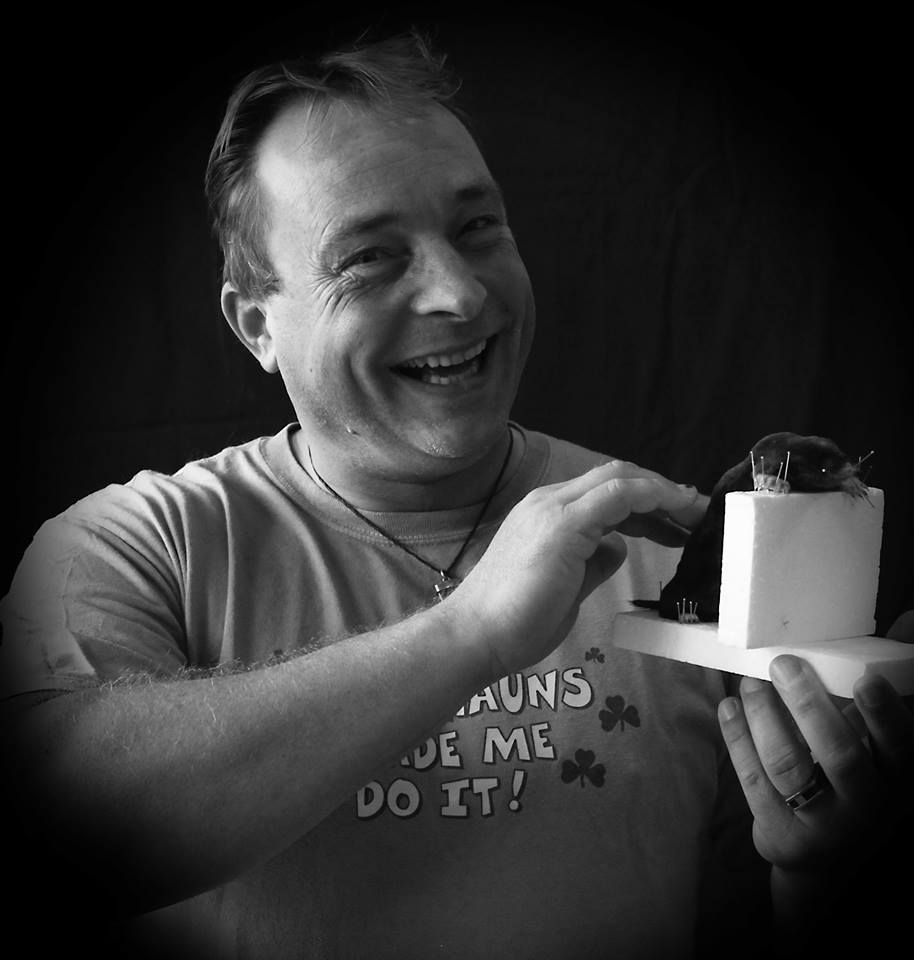
Put the mole in the desired position and use needles to keep things in place. Look every 2 days that everything is still in place and after 2 weeks the skin is dried and hard.
Result
The normal position of a mole is just flat on his tummy. Why did I create a mole which was kinda standing up ? So that it can be put against a piece of wood so that it looks like it is just outside of the tunnel of the mole.
If you like my blogs, please buy me a coffee and I can create some more nice articles.![]() Thank You !
Thank You !