There are many cool HX 2.5 features and one of them is native replication. But how do you configure this ? Well. Let’s start.
What is Hyperflex replication ?
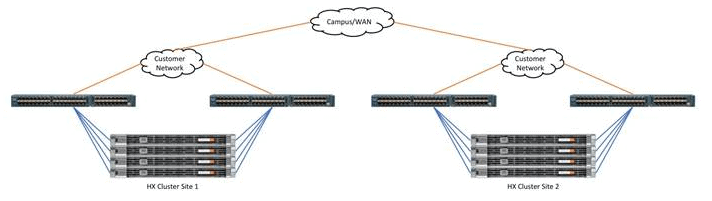
It is possible to replicate VM’s from one Hyperflex Cluster to another Hyperflex cluster. In case of a disaster, you can (manually) start the replicated VM’s at the secondary cluster. Right now there are some limitations. Please read always the release notes of the software version.
Step 1 : Create replication network on the Hyperflex clusters.
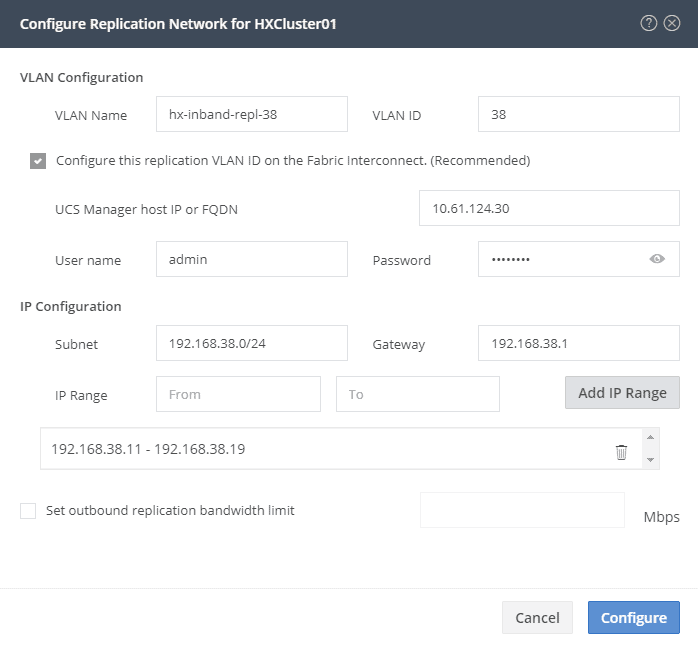
First you will have to configure the Replication Network. It’s easier to have a routed network.

I am lazy so I like the UCS Manager configure the VLAN for me on the Fabric interconnects. I got a special VLAN for the replication. The IP Range should be #Nodes + 1 ! So if you have 4 nodes, the range should be at least 5 ip addresses. Make sure your range is big enough for the future.
It’s possible to have some bandwidth restrictions regarding replication traffic.
 Finally the replication network is created and you will see something different.

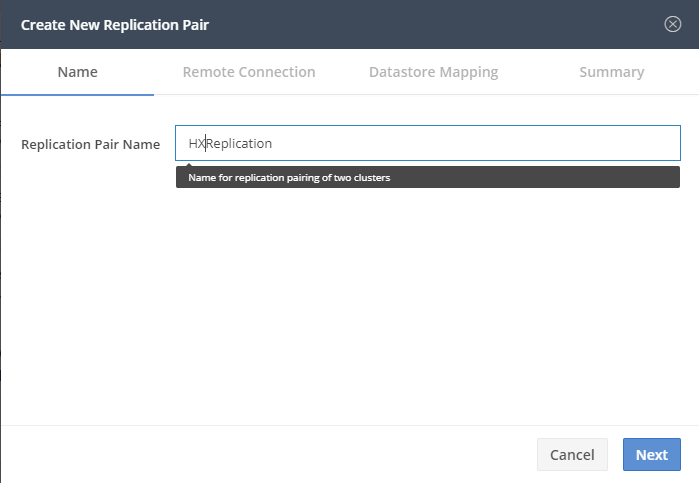
Now you can configure the Replication Pair
Step 2 : Replication Pair
Fill in the name of the Replication Pair. Right now Hyperflex 2.5(1c) can only have a 1:1 relation with eachother.
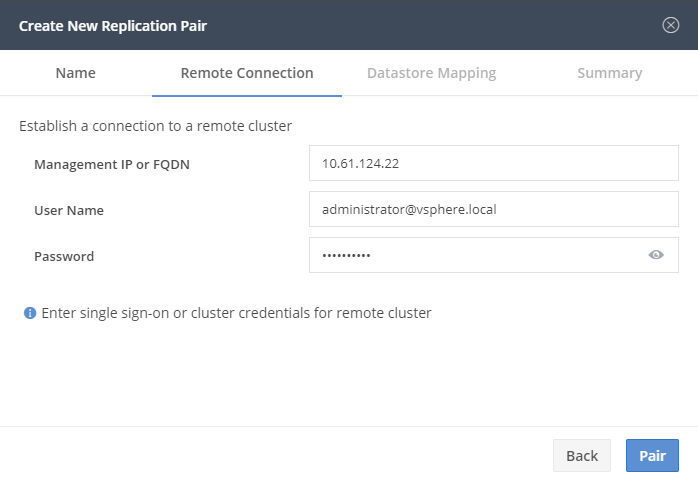 The username here is NOT local/admin ! It’s a user with admin right of the SSO of vCenter !
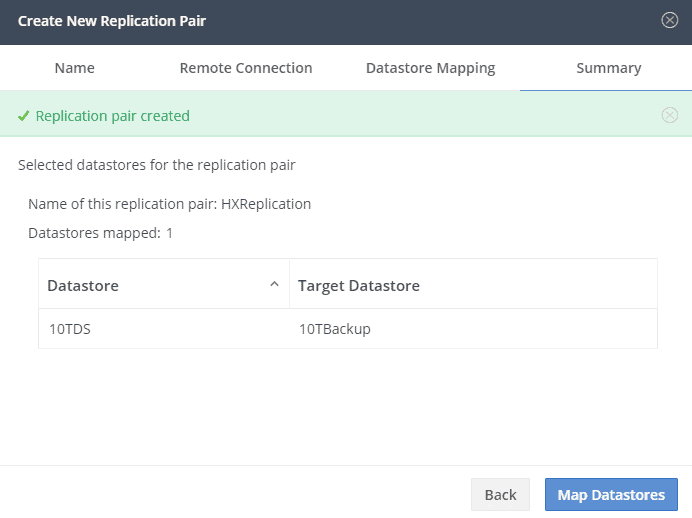
Now we can map the datastores. It’s just a place where the replication will land. It’s easy to have a dedicated datastore for replication, but it’s not a must.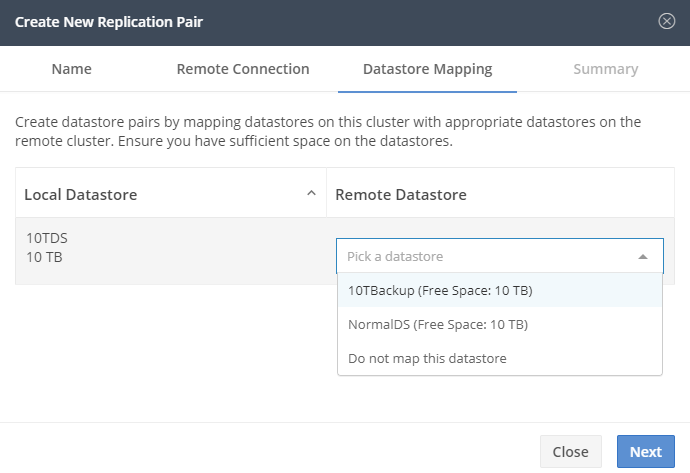
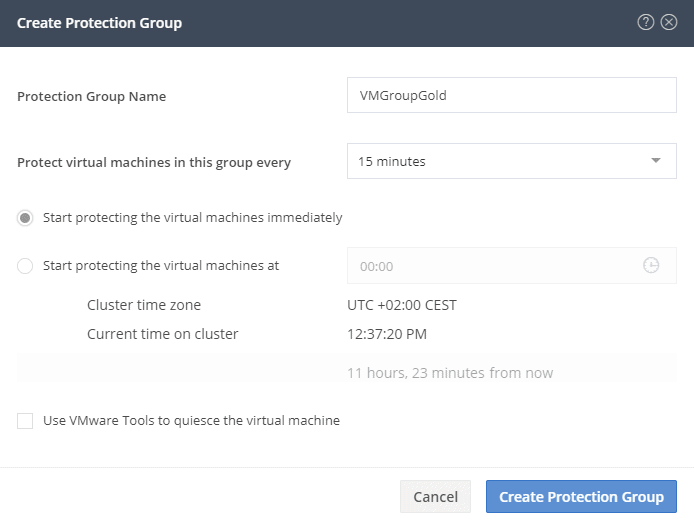
Step 3 : Create Protection Groups
A protection group is a group of VM’s with the same replication scheme.
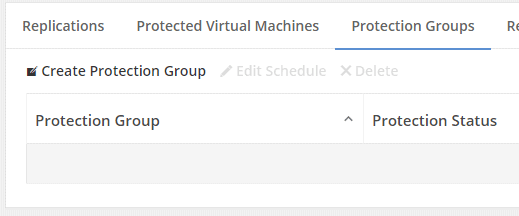
Ofcourse it’s also possible to protect a VM without group scheme.
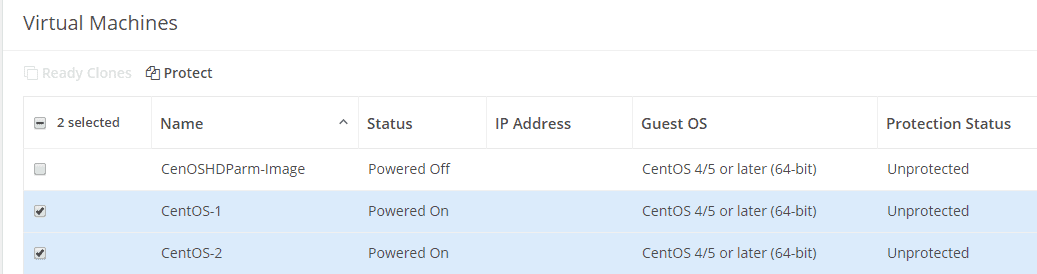
Step 4 : Protect the VM
Just select VM’s you want to protect.
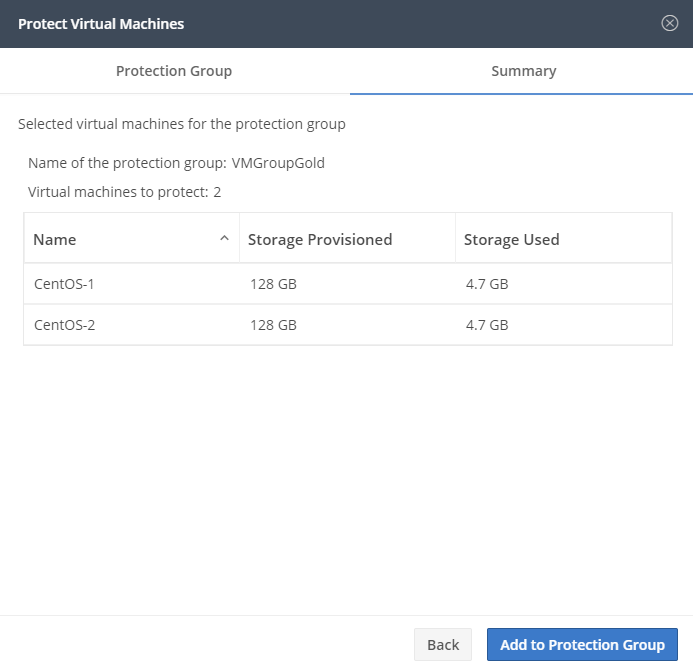
The Protectiongroup was already created, but you can create your own also right now.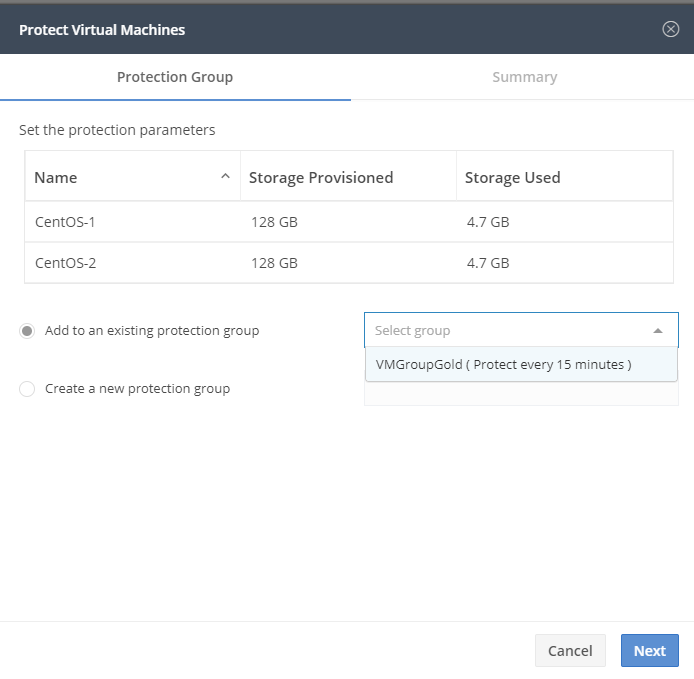
 Now you can see that the VM’s are protected and to which group they belong.
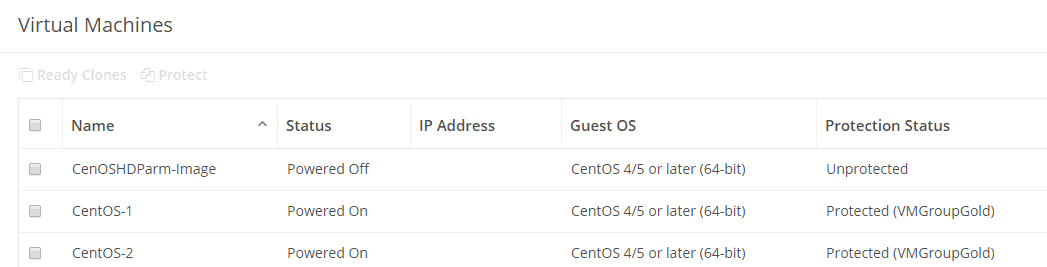
Step 5 : Monitoring the VM Protection
As long as you see green arrows, it’s alright. If the status is active, then the replication is not finished yet.

In the overview you can see how many VM’s are protected and how many replications are in progress. Click on the graph and you will see some details regarding bandwidth.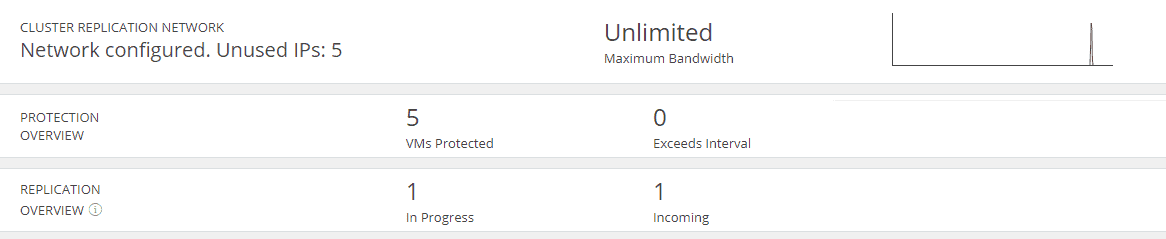
Bandwidht usage of the Replication.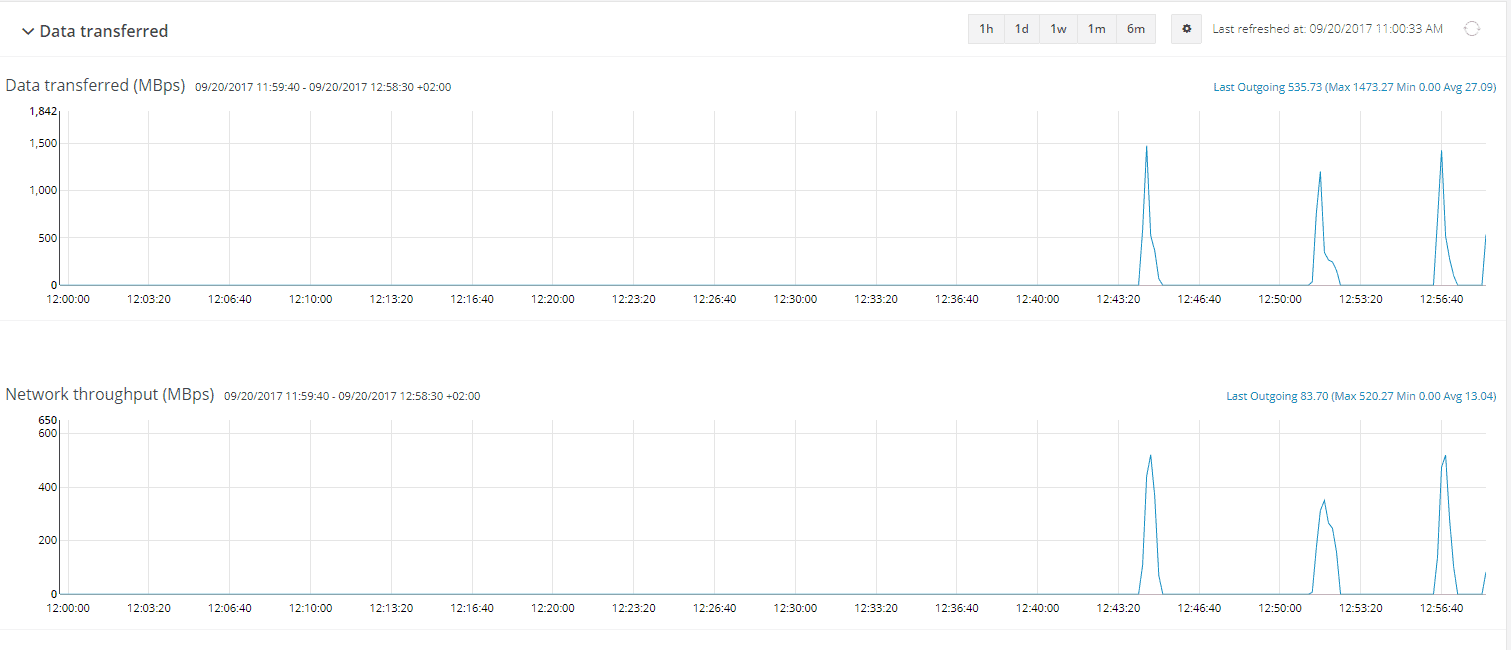
Step 6 : Test
A disaster is never a happy event and you can test in advance if everything is working.
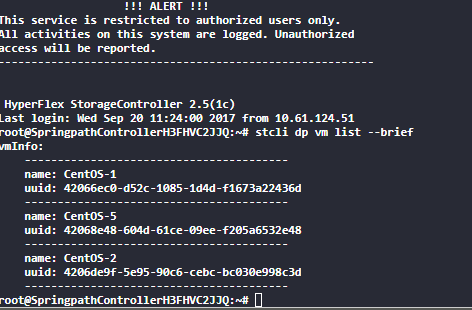
First you will need the ID of the VM :
stcli dp vm list –brief
 With :
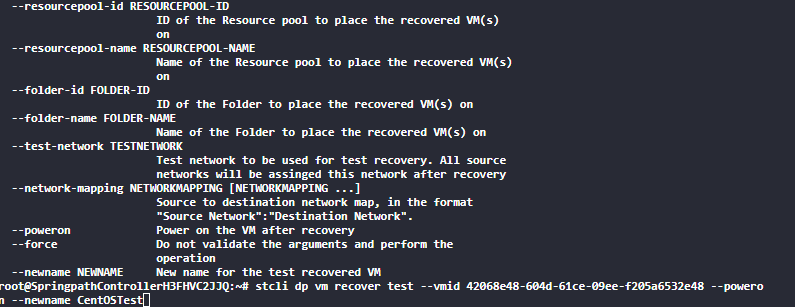 stcli dp vm recover test –vmid <vmid> –poweron –newname <NewName>
This test will create the VM at the recovery stite. With –poweron the image will also be powered on and I use –newname just to give it another name.
Ofcourse you can do this also with the API !

And here you see the image running. If you’re doing some testing in the lab, make sure that the booted VM’s don’t interrupt eachother with the same IP addresses etc. It’s better to choose a different network.
Step 7 : Disaster Recovery of the VM’s.
For a real disaster Recovery you will halt the replication with :
stcli dp vm halt –vmid <VMID> or sticli dp group halt –id <group id>
 Now you can type :
stcli dp vm recover failover –vmid <vmid> and that’s it !
Once you halted the replication, you can’t start it anymore. Works as designed !
Step x : Automation
Wouldn’t it be an easy world if everything was automated and you don’t have to do any manual labor ? In the next blog I will explain how you can create your own script with API calls to automate everything.
Some nice Cisco Validated Design documentation about Hyperflex can be found at : here
Hi Joost
My name is Neo. After I did the replication settings, but I want to modify the ip configruation, but they are gray I can’t modify it. So do you know how to modify them?
Thank you
Hello Neo,
Unfortunally at this time the procedure isn’t written yet. Please contact TAC for assistance.
Personally I just remove the replication settings and recreate it.
Thanks for your advice.
Hello!
How do you remove the replication settings? I don’t see any way for removal using the HX Connect GUI.
Thank you!
You can’t remove it right now. If you want to have it removed completely, please contact TAC.
hi, may I know how can we perform failover and failback in cisco hyperflex
See : http://iamjoost.com/2018/06/01/disaster-recovery-with-hyperflex-replication-3-0/
In HX2.5 you should use the CLI. HXDP 3.0 is way easier to recover the VM’s. (Or use API’s….)
Thanks for the post,
I have configured replication setting, But due to some data store requirement I have added new Data Store in DC site. Now I want to Pair new data store with DR site. Can you tell me procedure for same.
Regards,
Premnath Bangar.
At the Replication / Replication Pair. You can edit it and assign the new Datastore.
Hi! May I ask if there is a minimum network bandwidth requirement for the replication cluster and what it is? Thanks!
The minimum bandwidth depends on your RPO time. If it’s 5 minutes, then all of your backups should be in 5 minutes from Site A to Site B. I don’t know the size and numbers of your VM’s.
It does work over 64 Kb connection, but the faster the better. 🙂